The idea of this technique, from "kennysarmy", is to create the effect of having an image made up of a monatge of separate polaroid photos. This is the image he created using the effect.
 |
| Polaroid Play by kennysarmy |
This is an image of his daughter and she certainly did not stand that still while he took 30 or so polaroids and shhok his hand off in the process. No what he did was to use a photoshop action to create this illusion.
Here's how he did it. First of all he downloaded a photoshop action called polaroid from "addicted to design.com". This website has a number of actions for use with photoshop which can all be downloaded for free and is well worth a visit.
Actions are a kind of "macro" for photoshop. In other words they are a series of actions taken by a photographer which are recorded so that when you click play on that action photoshop will do everything that the person recording the action did, but on your photo. ( You can record your own actions to save time if there are any complicated sets of tasks that you repeatedly do). To install an action once you have downloaded it is not difficult and there is a simple step by step guide on addictedtodesign website.
Open one of your images ( just to be safe I would then save it immediately under a new name to avoid any chance of messing up your original and close it down again). In this example I have chosen a simple image to illustrate the ideas.
This one for example does not have a lot of detail to match up so it is an easy one to start with.
 Then you should open the "actions" pallete from the "windows" tab. This will list all of the actions that you have available, including the polaroid one if you carried out the installation instructions properly.
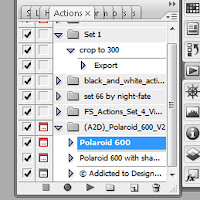
You will see that the action "polaroid 600" is in the list. Make sure you have it highlighted and then click on the play traingle at the bottom of this window. This will prompt you to open the image. This time when the image opens it will have an area already highlighted. This is the part of the image that will be turned into a polaroid.
As soon as you click on this it will carry out the actions and create a polaroid based on this small selection. The polaroid in this example will look like this.
What you need to do then is to save this as, say, "polaroid1". Then you just keep on repeating the whole thing, moving the selection to a new part of your original image before clicking on it. Then save each new polaroid. Keep this up until you have enough polaroids to cover the whole of the original image. Don't worry if they overlap - that's the beauty of this technique.
The next step is to open up a new, large blank image. This will be the canvass that you use to layer your polaroids onto.. From here on it is simply a matter of pasting each image onto this canvass as a new layer and positioning then so that they match up to the original ( or not if you are feeling a bit Picasso like ! ).
Finally - hey presto you have a polaroid monatge just like this one.
Thanks to Jeff ("Kennysarmy" on flickr )


No comments:
Post a Comment